This article is the part of the series related to mastering DP-500 certification exam: Designing and Implementing Enterprise-Scale Analytics Solutions Using Microsoft Azure and Microsoft Power BI
Table of contents
Congratulations! In this module (Design and build Tabular models), you’ve learned how to design and build large format datasets, how aggregations can speed up your Power BI reports, and how to leverage composite models feature to get the maximum flexibility in designing enterprise-scale tabular models. Not just that, you’ve also discovered how DirectQuery works in Power BI, what are external tools, and how to extend your data modeling skills by creating calculation groups. Don’t forget some little DAX tricks with variables, virtual relationships, and iterators…
It’s time to wrap up this module by explaining how to secure your data – or maybe it’s better to say – how to control the access to certain portions of your Power BI solution. You can choose between Row-level-security (RLS) and Object-level-security (OLS). To be clear, it’s not that choosing one eliminates the possibility to use another – you can use both RLS and OLS within the same solution.
Let’s make a quick distinction between these two and in which scenarios would make sense to use RLS, OLS, or both. We’ll start with the “older” cousin – RLS, which is a feature available for a long time in Power BI.
Row-level-security in a nutshell
The idea of RLS is to restrict access to data for specified users, on a row level. However, this definition of RLS, that it can restrict access to data for specified users, on a row level may be, in my opinion, well…a little bit confusing. And, let me explain why…
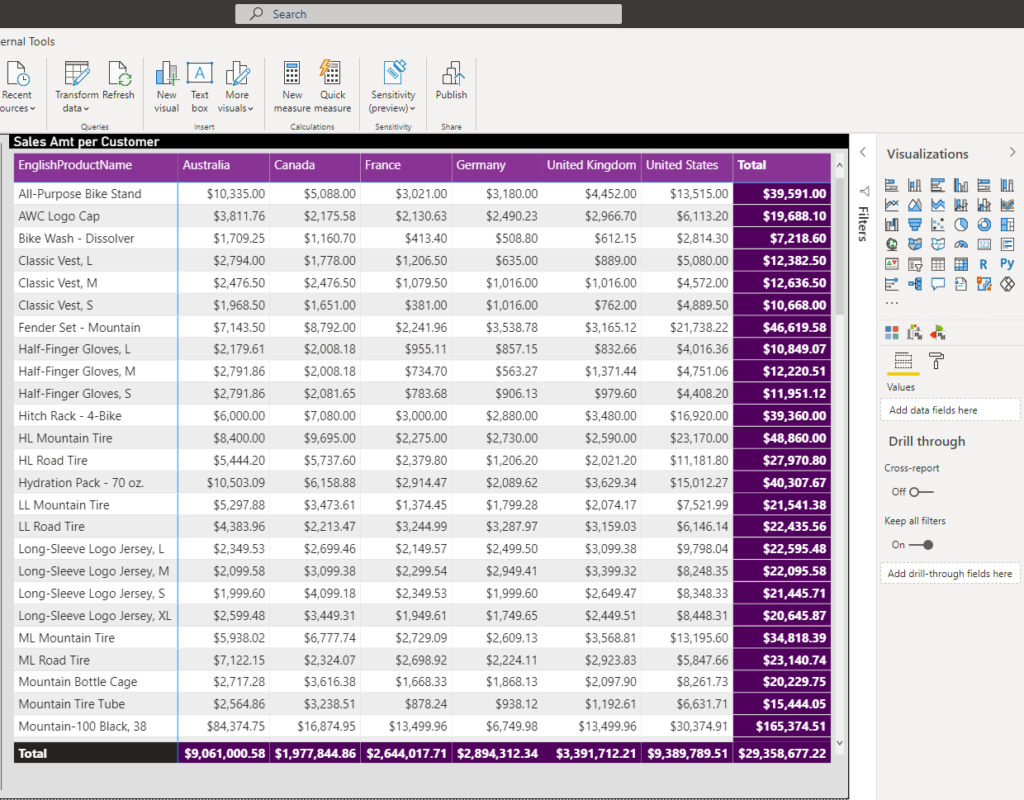
Let’s say that I have a matrix displaying the total sales amount for every single product and country. Countries are COLUMNS in our matrix, and let’s imagine that we want to limit access to a specific group of users to see numbers only for Canada.
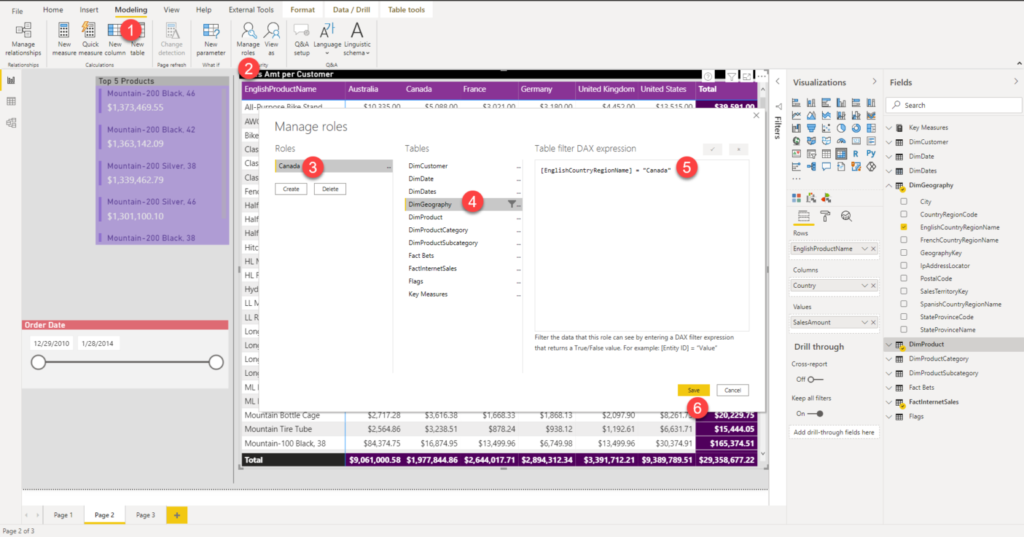
We would go to the Modeling tab, Manage roles and create a role Canada, that will filter the data for Canada only:
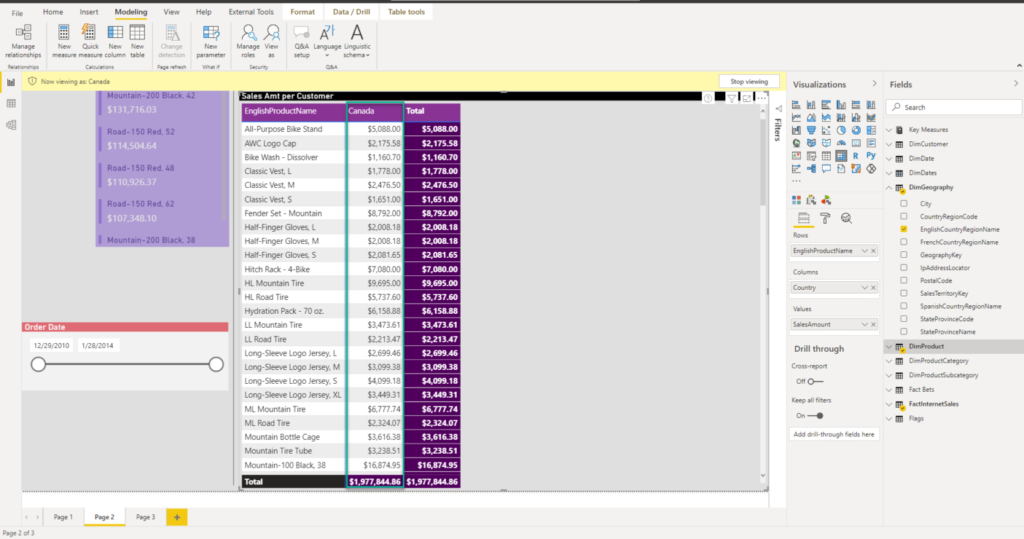
And, if I choose View as role “Canada”, you can notice that only Canada numbers are left in the report:
Now, if you think of Row-Level security as something that is applied strictly to rows…well, in this case, it was a column:)
Therefore, I like to think about Row-Level security as limiting access to specific attribute(s) – for example, country (like Canada only), product category (i.e. Economy, Regular, etc.), customer’s location, and so on. Whether they are displayed as rows in your report or not!
On the other hand, I prefer to think about Object-Level security as limiting access to numbers (measures), such as Unit Cost, or Company Expenses, or complete data objects – for example, whole tables, or whole column(s) of the table!
But, going back to explain RLS in more detail…First of all, RLS works for both Import mode and DirectQuery, but it’s not available in Live Connection mode to Analysis Services or Azure Analysis Services data source. Or, it’s better to say: RLS is, in fact, available in Live Connection mode, but has to be defined on the source side (in AS or AAS), not in Power BI Desktop!
You start by defining the role (like I did in the example above) and using DAX to set specific filters – in our case, I’ve set the filter that says: display only those rows where the country equals “Canada”. If you’re coming from the SQL world, you can think of these conditions as WHERE clause in the SQL statement.
There are two main types of RLS in Power BI:
- Static RLS
- Useful in basic scenarios, when there are not many users, no complex restriction requirements, and access rules are not changing frequently (think of it based on our previous example: all users from Canada will always be able to see only the numbers for Canada)
- Rules for static RLS are being maintained from within a PBIX file
- Often easy and straightforward setup
- Some downsides: maintenance overhead, lot of manual work, not reusable
- Dynamic RLS
- Slightly more complicated setup, but gives you the possibility to control the access on a more granular level
- Access control is defined within the data model, via tables and relationships
- Reusable and requires less maintenance
- Some downsides: adds to model complexity
There are many great articles on the web, explaining step-by-step how to create and manage static and dynamic RLS, such as this one from Reza Rad. Essentially, you’d leverage the USERPRINCIPALNAME() function in DAX to capture the login of the user that currently browses the report. And, based on the rules you specified in your data model, users with specific login credentials will be able to see only certain parts of the data.
While setting up static RLS is an easy and straightforward process, dynamic RLS offers various implementation options – based on your business scenario, you may want to split users and roles in different dimension tables. Also, you should evaluate the performance of the filters, as you will have to choose between enabling bi-directional cross-filtering, or writing DAX to handle filters.
RLS Considerations
- One user in multiple roles – RLS filters work in an additive way. That means, if the user is a member of the Role “Employee” that restricts access to attribute “Salary”, if the same user is also a member of the Role “Finance” that has access to attribute “Salary”, they will be able to see the data
- Performance impact – RLS is a very powerful feature, but like any other powerful feature, it also comes with a price. As RLS will apply additional filters to every single DAX query, it may happen that RLS is responsible for the performance downgrade. Try to follow general recommendations for the Power BI data modeling (who said, Star schema and 1:M unidirectional relationships), and make sure to enforce RLS filters on dimension tables instead of fact table(s)
- Try to assign AAD groups, instead of individual user accounts to defined dataset roles (reduces the maintenance overhead)
- Check the official RLS guidance from Microsoft for additional recommended practices
Object-level security in a nutshell
Before OLS was introduced in Power BI, I used a simple RLS trick to hide the whole table from specific users. Let’s say that I want to restrict access to a whole DimGeography table in my data model. I can go and do something like this:
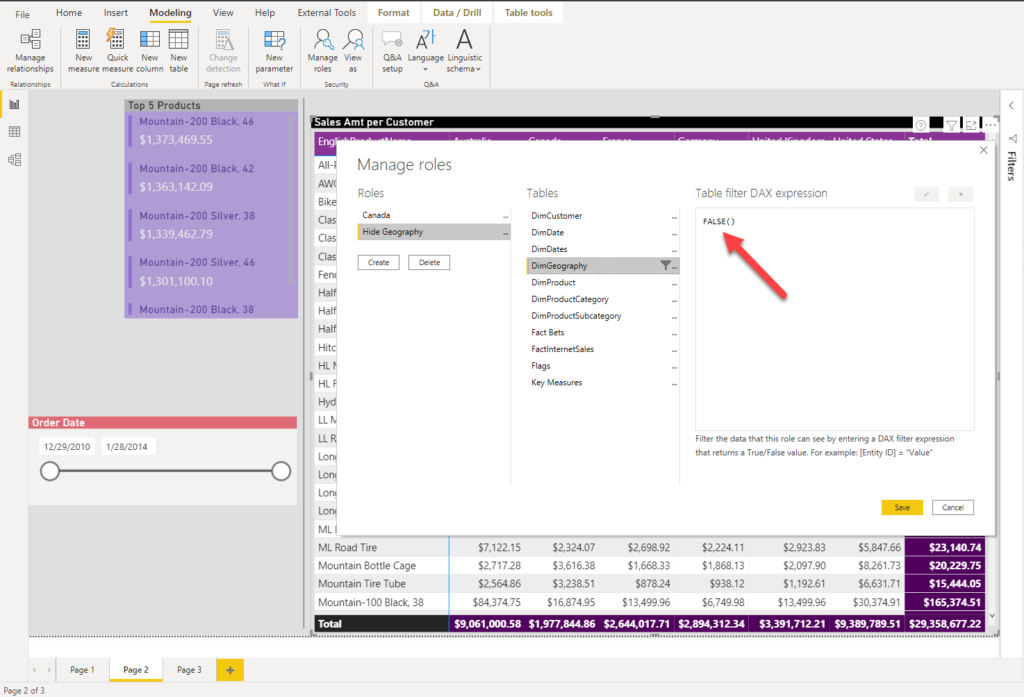
I’ve created a role called Hide Geography, selected the DimGeography table, and just put FALSE() as a DAX expression!
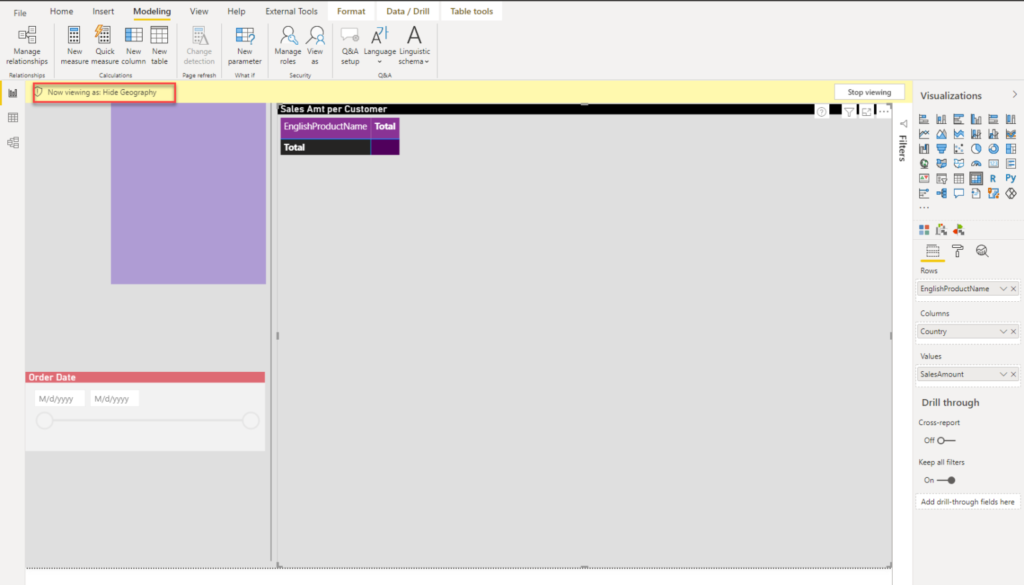
Boom! The matrix is completely empty now! That’s fine, but what if I want to hide only specific measure, for example, total sales amount (I mean, in reality, you would probably limit access to more sensitive measures than the sales amount, but let’s pretend that only a selected group of people can see total sales amount in our report).
Here comes the OLS feature to the rescue!
Wait…How can I control OLS in Power BI?!
Yes, that’s the first…let’s call it limitation! You can’t specify OLS directly from Power BI Desktop – instead, you’ll need an external tool called Tabular Editor.
We’ve already examined some of the features that Tabular Editor provides (for example, creating Calculation groups), and you should definitely use it – be it for OLS, or not. Once you download Tabular Editor from here, you should be able to access it directly from the Power BI Desktop. Just go to the External Tools tab, and you will see all available external tools (the ones you’ve installed on the same machine where your Power BI Desktop is).
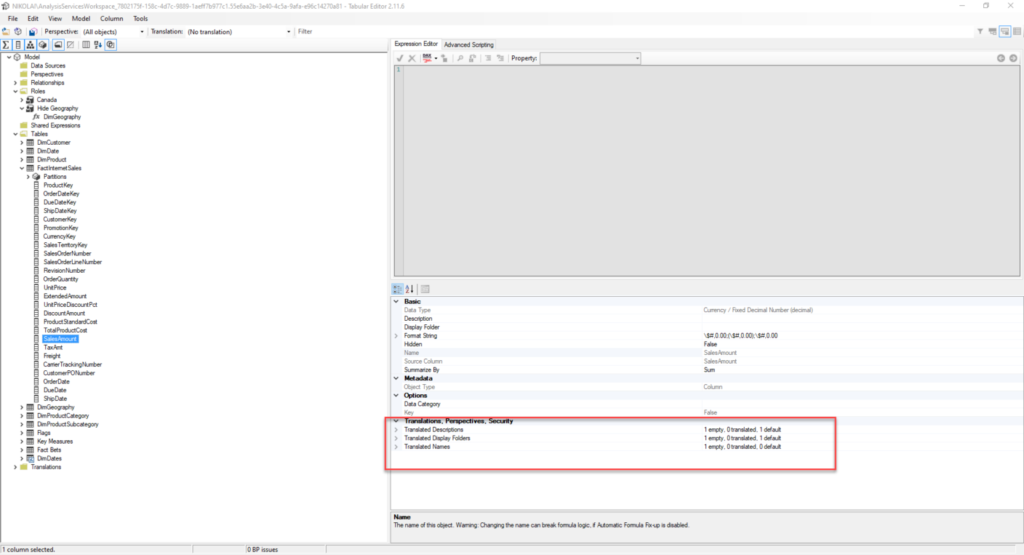
Gotcha #2 – not every Tabular Editor version will work for OLS!
In this example, I’m using a 2.11.6 version of Tabular Editor, and I don’t have an option to define OLS!
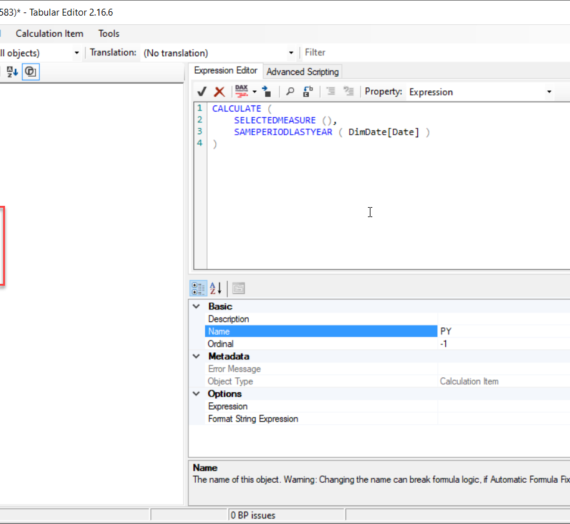
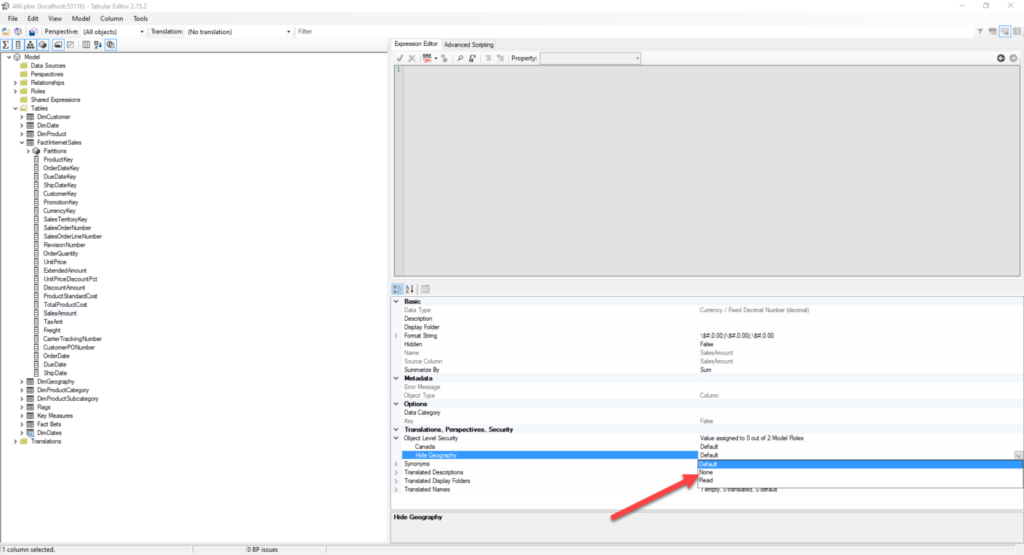
As soon as I’ve installed the latest version, I can see a whole set of new options for the specific column, one of them being Object Level Security:
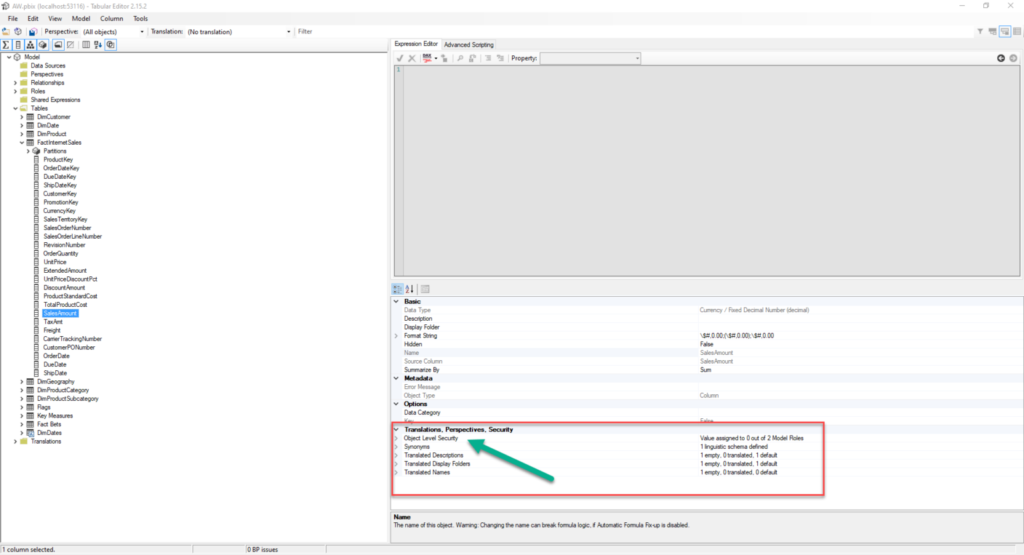
Now, instead of Default OLS, I will set None value to Hide Geography role, for the Sales Amount column:
I will then save the changes made in Tabular Editor, and go back to Power BI Desktop to check what will happen once I start looking at the report as a Hide Geography role member:
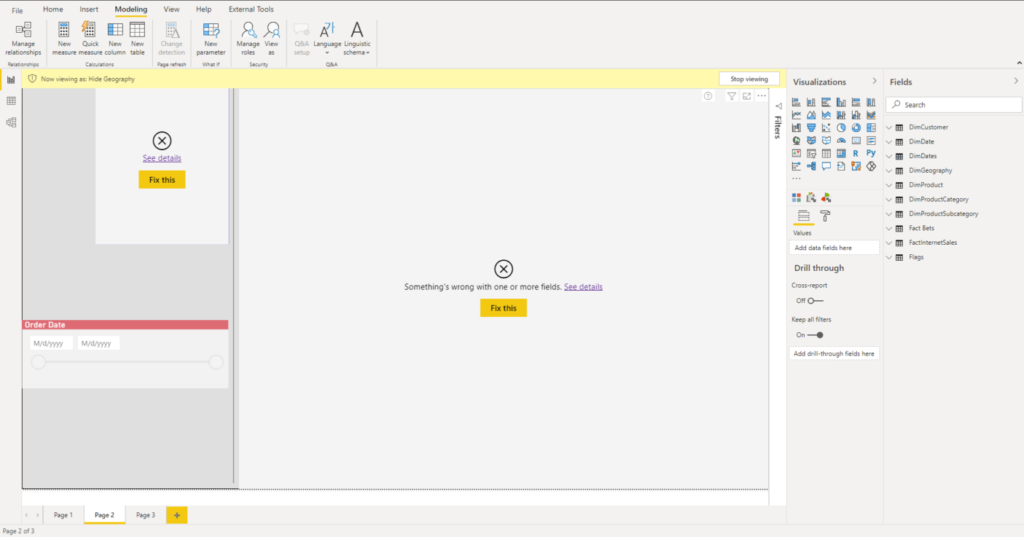
Wait, what??!! I’m getting errors within my report! But, why, what did I do wrong? I’ve just restricted access to a Sales Amount measure…
If I’m a user trying to understand what has gone wrong…well, let’s say that the I will find this message quite awkward:
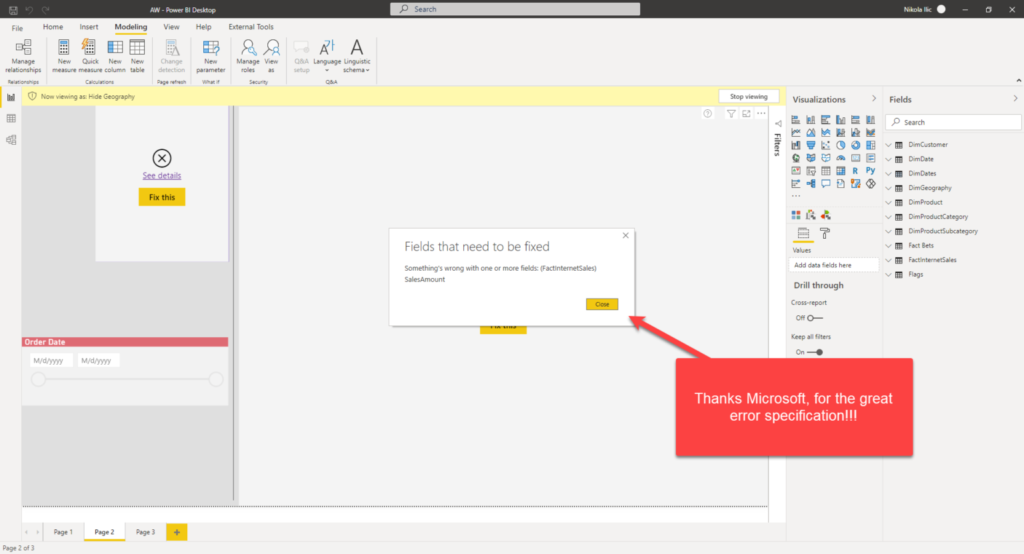
Gotcha #3 – Don’t try to “understand” the error message!
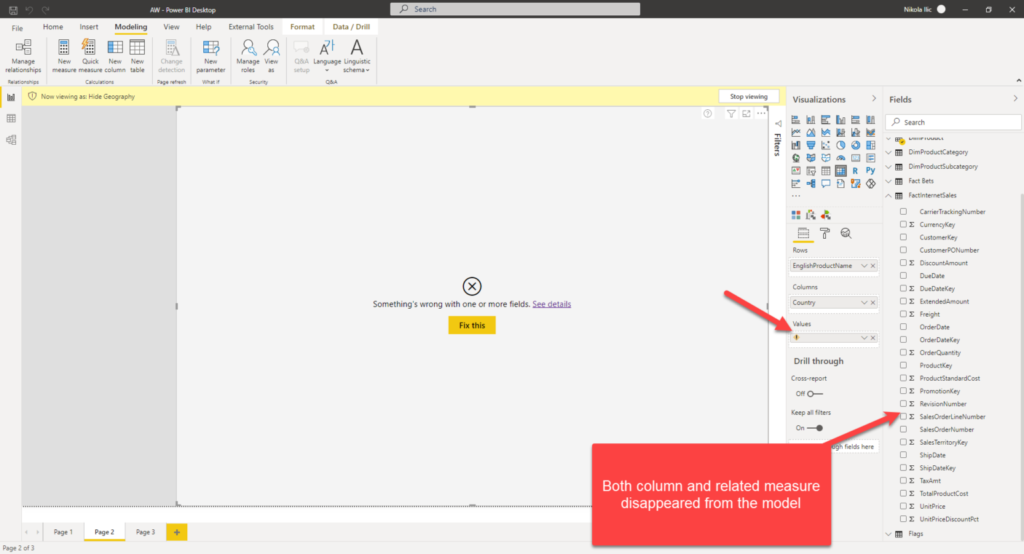
This strange outcome arises from the fact that when you apply OLS to a certain column, it behaves the same as if you deleted it from your data model! And, the following illustration confirms that:
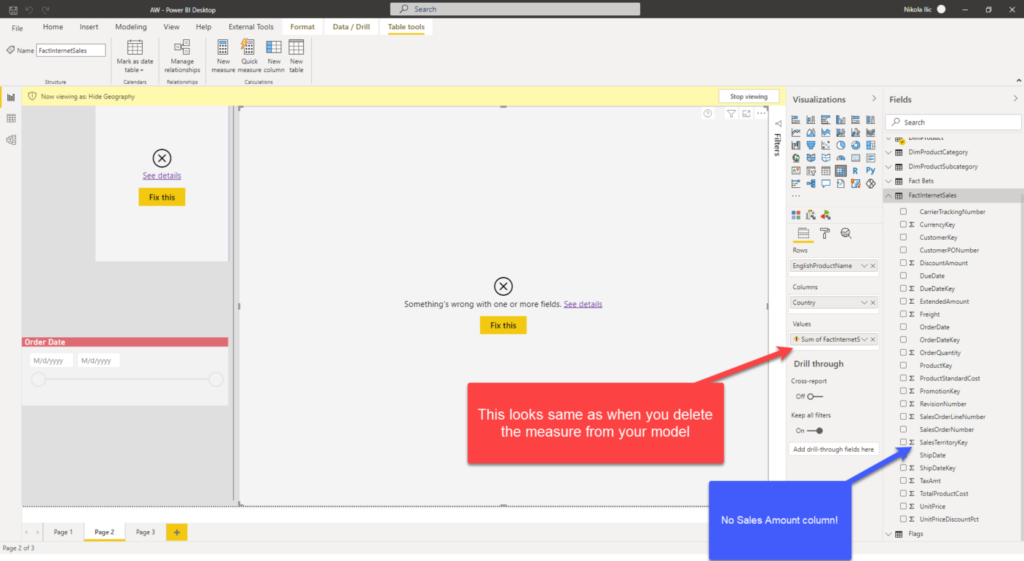
The key difference between RLS and OLS is that, when you apply RLS using DAX filters, data will not be displayed in the report, but the underlying metadata objects still exist in the model!
With OLS, the underlying object (in our example, the Sales Amount column) is completely obscured from the data model – in plain words – these objects simply don’t exist for the users that don’t have permission to access them!
Additionally, all measures that refer to the restricted column will also “disappear” from the data model!
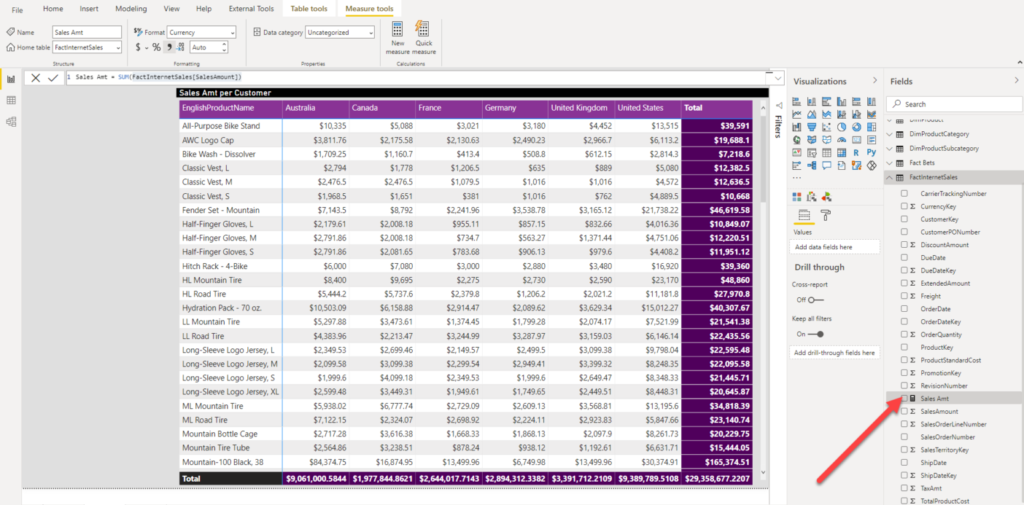
Look at this:
Sales Amt = SUM(FactInternetSales[SalesAmount])
This is a super simple explicit measure, showing the sum of the sales amount. And, this works as expected when the role has an access to a column Sales Amount:
But, as soon as I start exploring the report as a member of Hide Geography role, I will (again) see this “intuitive” error:
Conclusion
Both RLS and OLS in Power BI are powerful features, which give you a whole range of capabilities to control “who sees what” in your Power BI solutions.
However, don’t jump to a quick conclusion that the only difference between the two is the “direction” of the rules applied – horizontal vs vertical. RLS and OLS work in a completely different way – not only because you can’t configure OLS from Power BI itself (unlike RLS) – but more because of the manner that they “hide” the data from the users: with RLS, objects still exist in the model, while with OLS they are completely omitted!
Thanks for reading!
Last Updated on January 20, 2023 by Nikola