

If you’ve carefully followed the latest data news, you should have noticed that Microsoft made two important announcements a few weeks ago: the first, Azure Synapse Analytics became GA, while the other also caused a lot of interest: by introducing Azure Purview as the evolution of Azure Data Catalog, Microsoft proclaimed that this new solution will serve as a unified data governance and data management platform.
At the moment of writing, Purview is still in preview, so we can expect that specific features will evolve over time, and that some new features will find their place under the Purview umbrella.
As someone who spends most of my time working with Power BI, I was curious to explore how Purview looks from a perspective of Power BI professional. So, here are my thoughts…
Setting things up
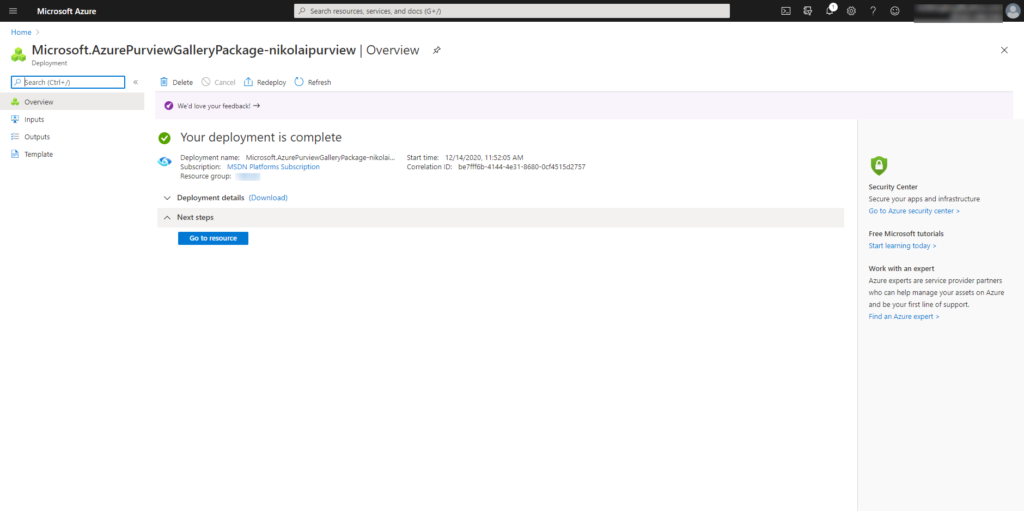
For the starter, we need to create a Purview account within the Azure Subscription. If you get some errors while configuring Purview, don’t be scared, it’s completely fine (yeah, I know that you think I’m crazy – how could the error be ok)…
But, in order for this to work, the EventHub service needs to be enabled in the first place. This way, Purview will be able to perform the scans of your data sources. So, let’s go and register EventHub service:
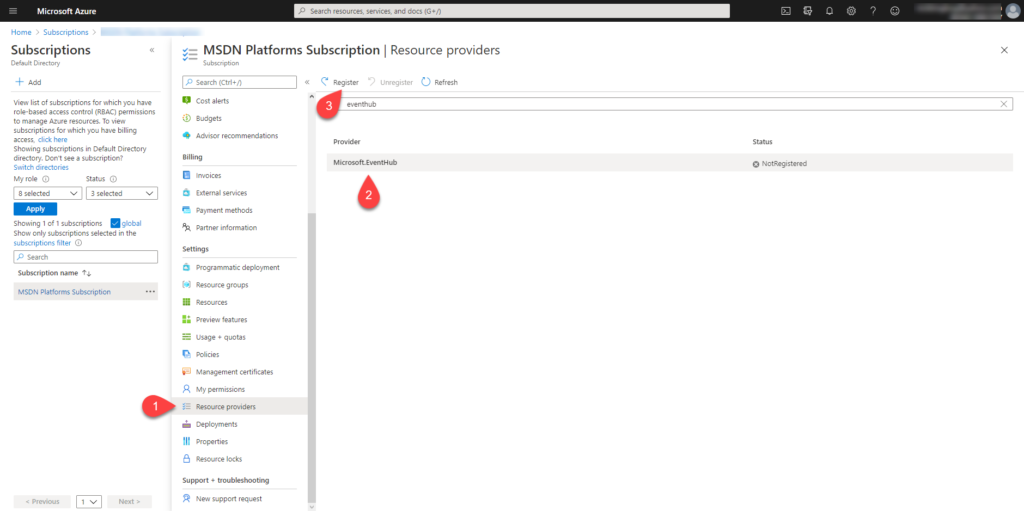
After successful registration of the EventHub service, you should be able to create a Purview account.
Now, before we start exploring our Power BI resources in Purview, some additional configuration needs to be done on Power BI tenant’s side.
Configuring Power BI Tenant
I will open my Power BI Admin portal, and under Tenant settings, find Developer settings property. Here, you will find an Allow service principals to use read-only Power BI admin APIs (Preview), and you need to enable this option:

You should tend to follow the recommended option here, and apply access to specific groups only.
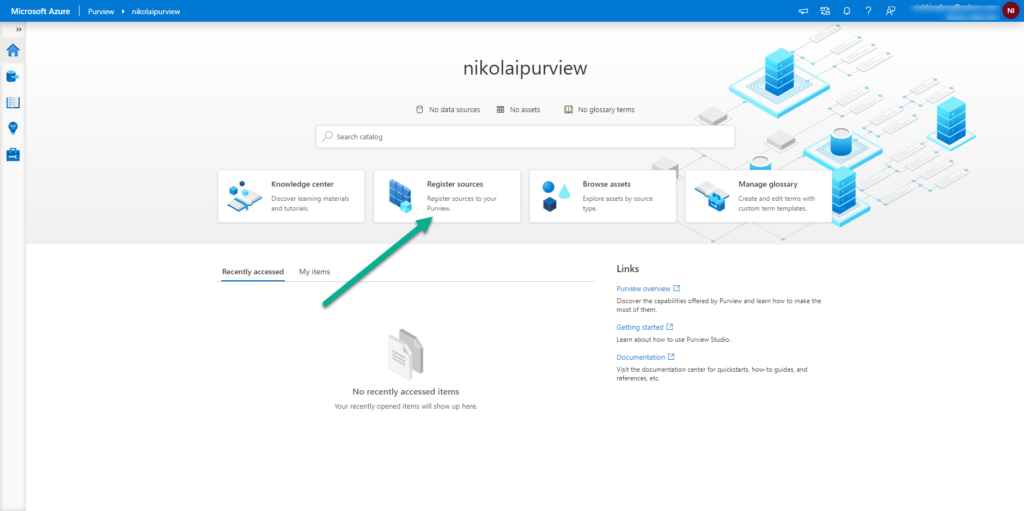
Once this setting had been applied, I will navigate back to my Purview account and register my Power BI tenant within Purview:
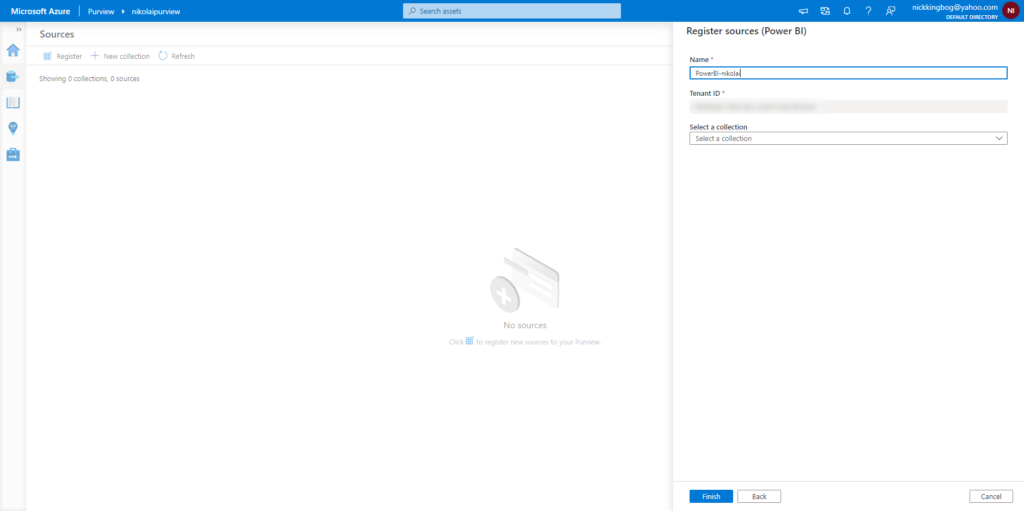
As soon as you click on Register, you will see a bunch of available sources. Since I want to register and scan my Power BI tenant, I will choose the Power BI icon:

I will specify the name for my Power BI service, and you should spot that Purview automatically discovered and populated your tenant’s ID!
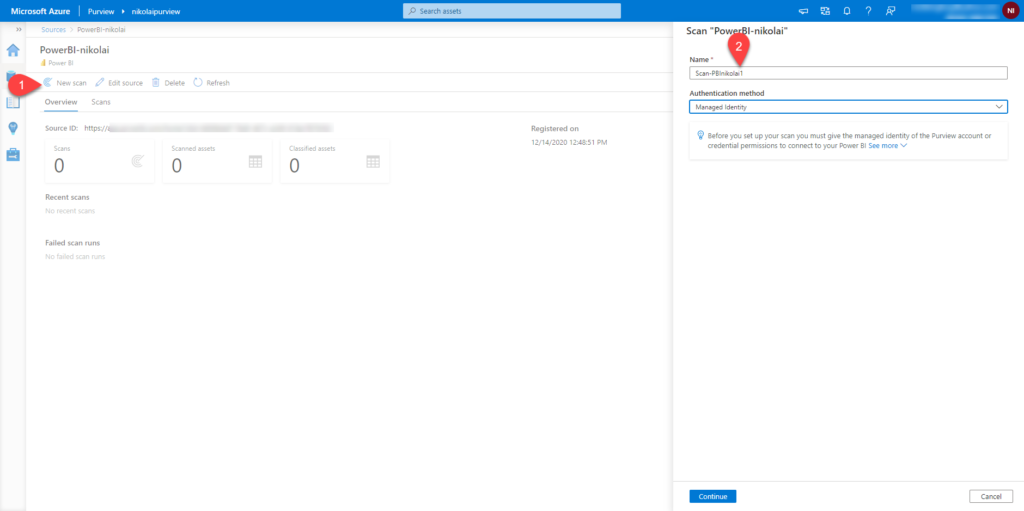
And once I click on my newly created resource, I will be able to see some statistics based on scanning history. Since it is my first scan, there is nothing so far, so let’s set inaugural scanning of the Power BI tetnant:
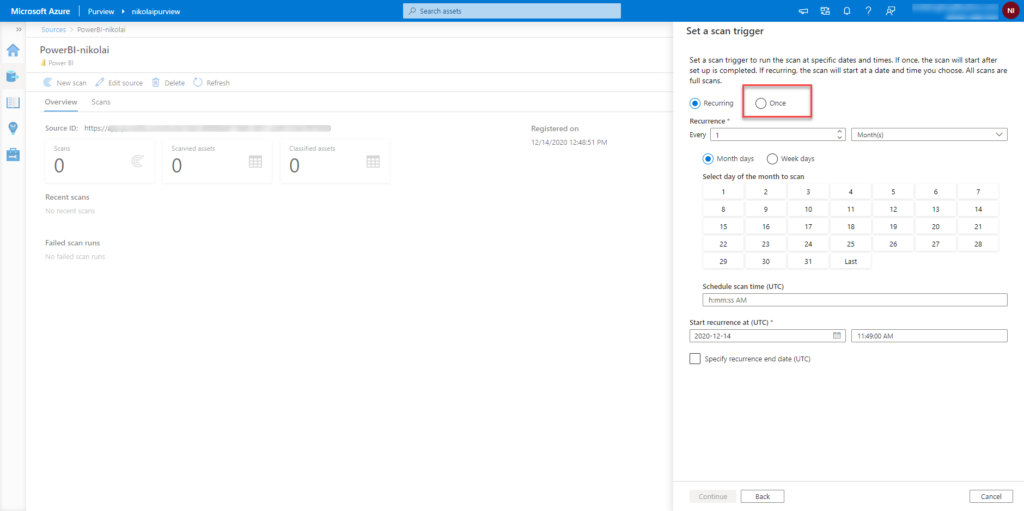
In the next step, you can specify the schedule for your scans (recurring vs once). Additionally, for recurring scans, you are able to set the frequency that best suit your needs. This reminds me of a schedule setting for SQL Agent Jobs (for those of you who are familiar with SQL Server, you would know what I’m talking about:))
As I just want to do some testing here, I will choose to scan my Power BI tenant only once:
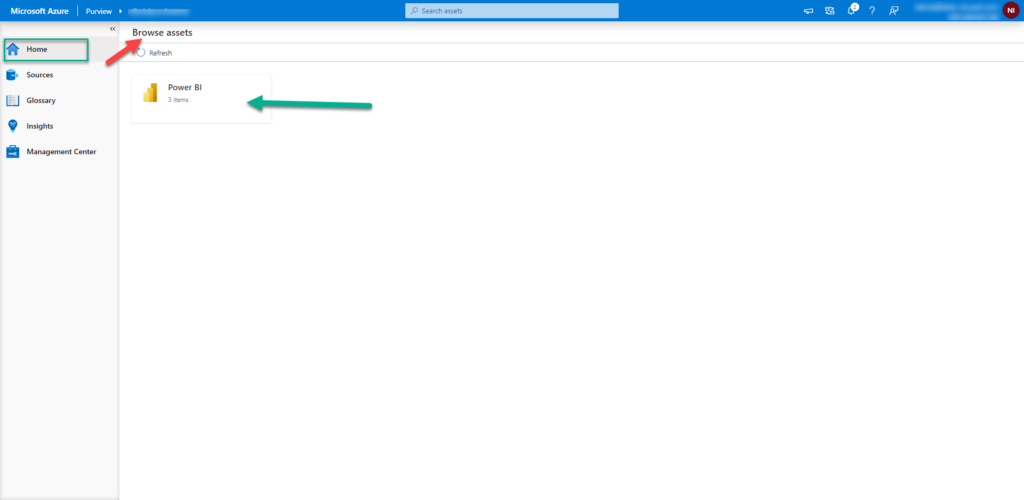
Once the scan is completed, I will go back to the Home tab of the Purview Studio and choose Browse Assets, and finally Power BI:
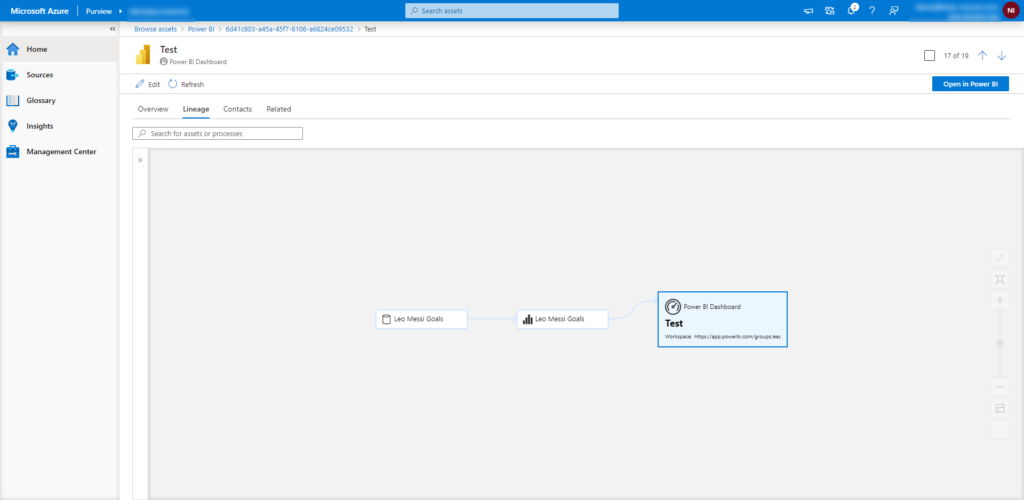
From there, I can explore my Power BI assets in a whole bunch of different ways. In the first place, I see all of my reports, dashboards, and datasets listed and classified:

My preferred way so far is Lineage mode, which gives me a nice visual overview of how different elements relate to each other within my Power BI workspace:
In the end, as you are probably aware, there is no free lunch! So, you’re probably asking yourself how much would it cost to use Azure Purview. At the moment of writing, since the product is still in preview, some features are free to use, such as scanning and classification of Power BI Service and SQL Server on-prem.
In any case, please refer to this official pricing list for the Azure Purview.
Thanks for reading!
Last Updated on December 31, 2020 by Nikola


Chandru Sugunan
Hi Nikola, Correction to the third screenshot from the top(Configuring Power BI tenant). The red box is pointing to incorrect feature switch.
The correct one is documented in our official Purview documentation page. https://docs.microsoft.com/en-us/azure/purview/register-scan-power-bi-tenant#associate-the-security-group-with-the-tenant
Nikola
Thanks for spotting it Chandru! It’s been corrected:)
Les Actus Power Platform du 05/02/21 - Neoreeds
[…] 📊 Power BI : Bien démarrer avec Azure Purview pour Power BIhttps://data-mozart.com/hitchhikers-guide-to-azure-purview-for-power-bi-professionals/ […]