If you ask me, bookmarks are one of the most powerful features in Power BI! I’ve already written multiple times about bookmarks: for example, how they can help you push the filtering experience to a whole new level, or to reinvent the traditional visuals, such as card, all the way to make your bookmarks safe for “on-click” behavior.
What is bookmark anyway?
Bookmark is a Power BI feature that enables you to capture the current state of your report page. And, you can then refer to this captured state, as a “special” page – through the Action property on your buttons, images, shapes, etc.
By default, when you create a bookmark, it will capture the current state of the following report elements:
- Filters and Slicers, including slicer state
- State of the visuals’ selection (for example, if your visuals are cross-highlighted)
- Drill location
- Sorting within visuals
- Visibility of the report element (this is handled via Selection pane)
- Focus or Spotlight mode, if any
However, once you choose to create a bookmark, you would see a drop-down menu with some options – and most of them are already checked in advance! So, let’s examine what these options mean for you…
Why Data option matters?
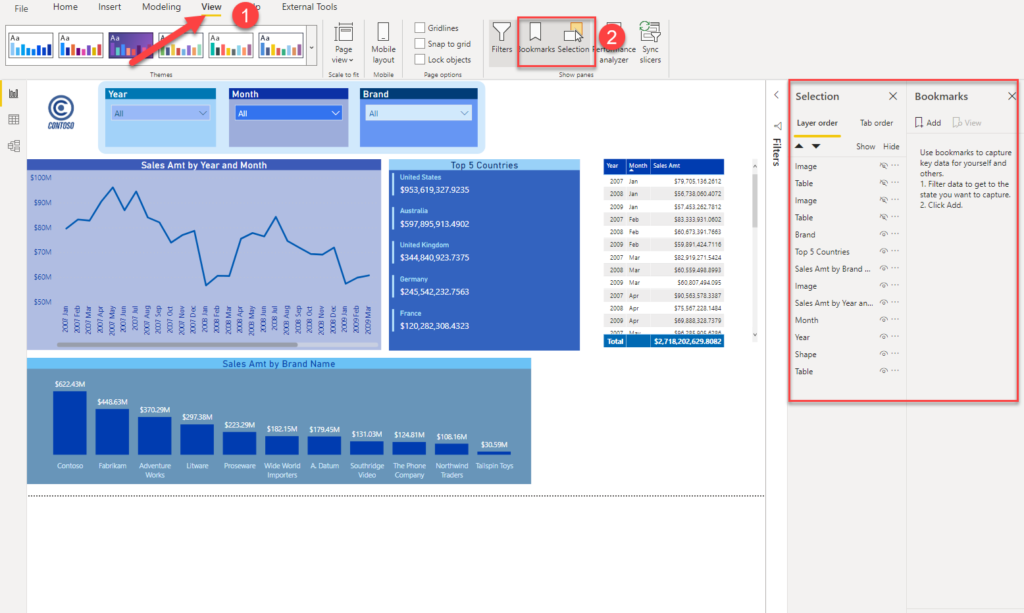
When you work with bookmarks, the first step you need to do is to turn on Bookmarks and Selection panes. Bookmarks, well, for an obvious reason:)…And, through Selection pane, you have a full control of the visibility of the individual report elements.
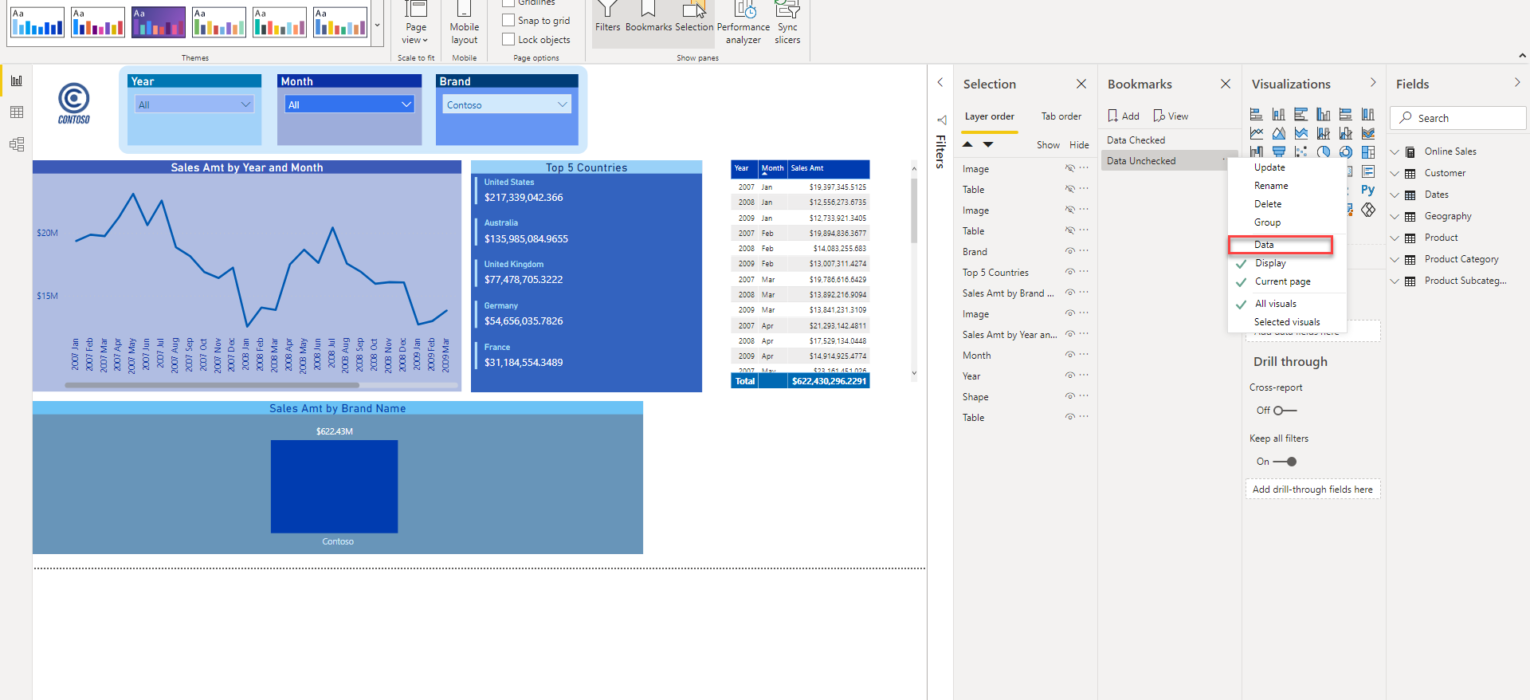
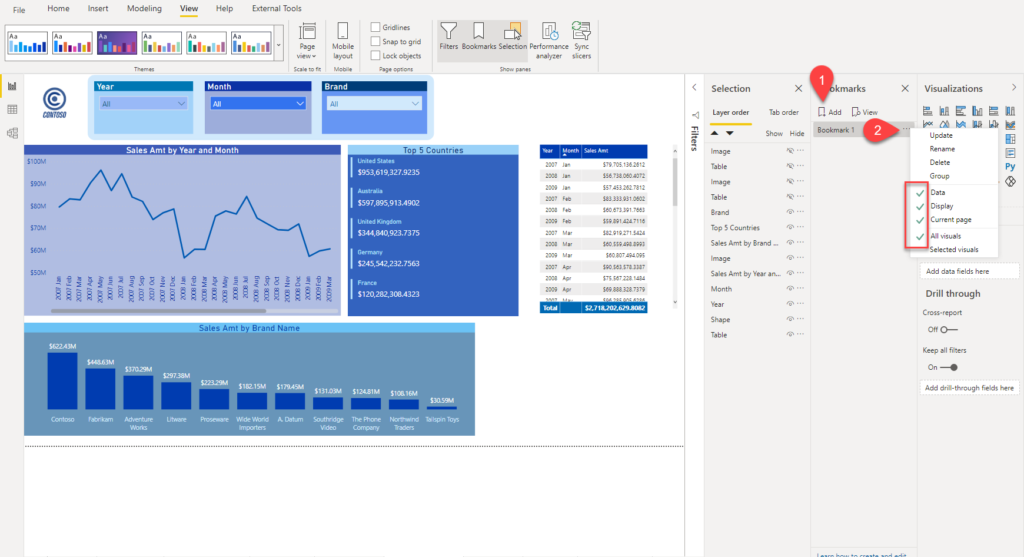
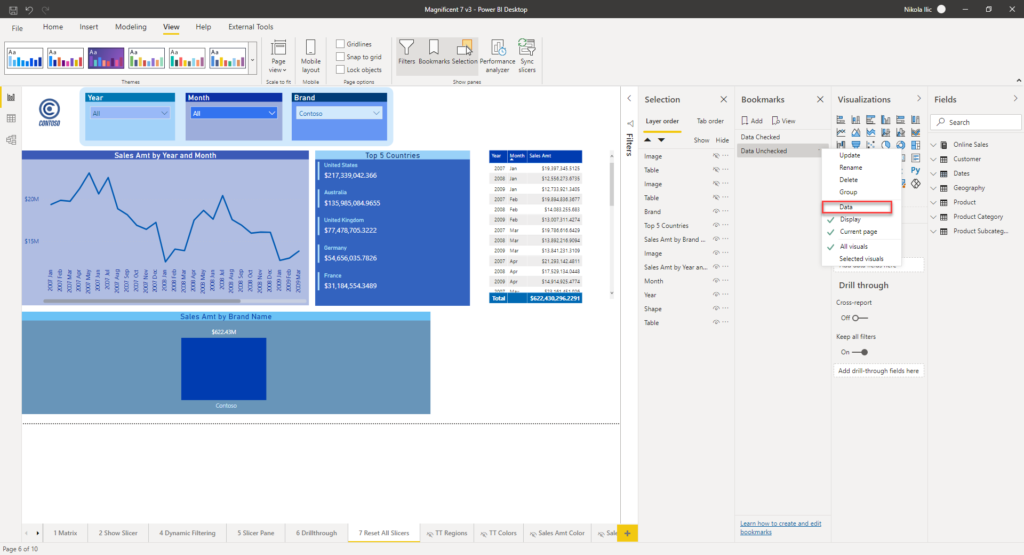
Now, when I add a Bookmark and click on three dots next to it, a drop-down menu appears, with many options pre-checked:
When you leave the Data option checked, it will capture the current state of the data within filters, slicers and visuals, and each time you are navigating to this bookmark, you will see exactly the same state of your data!
Let’s create a bookmark that will capture the state of our visuals filtered by the Contoso brand, with the Data option checked:
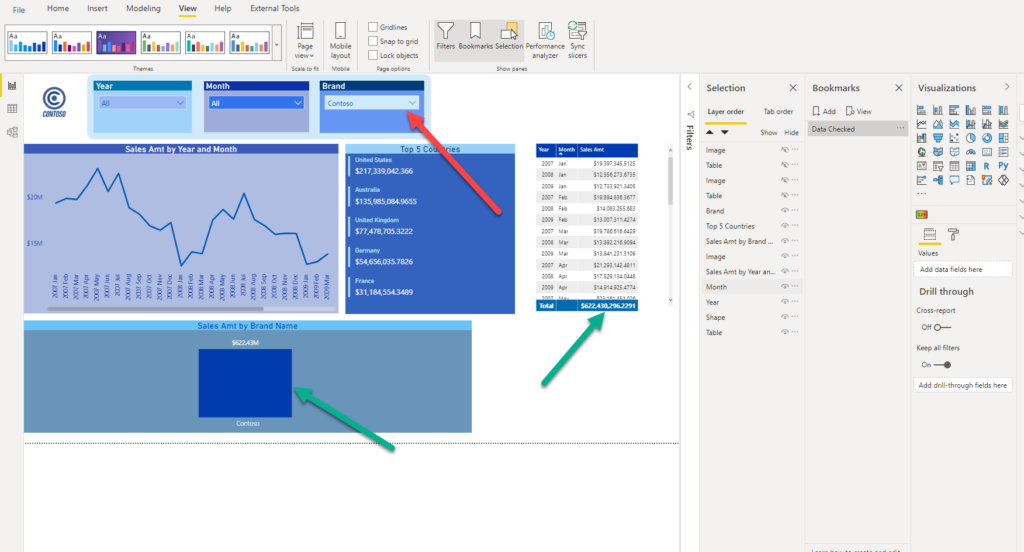
As you may notice, data is being filtered by Contoso brand, in all report page visuals.
The next step is to create the bookmark capturing exactly the same state of the page, but this time with Data option unchecked:
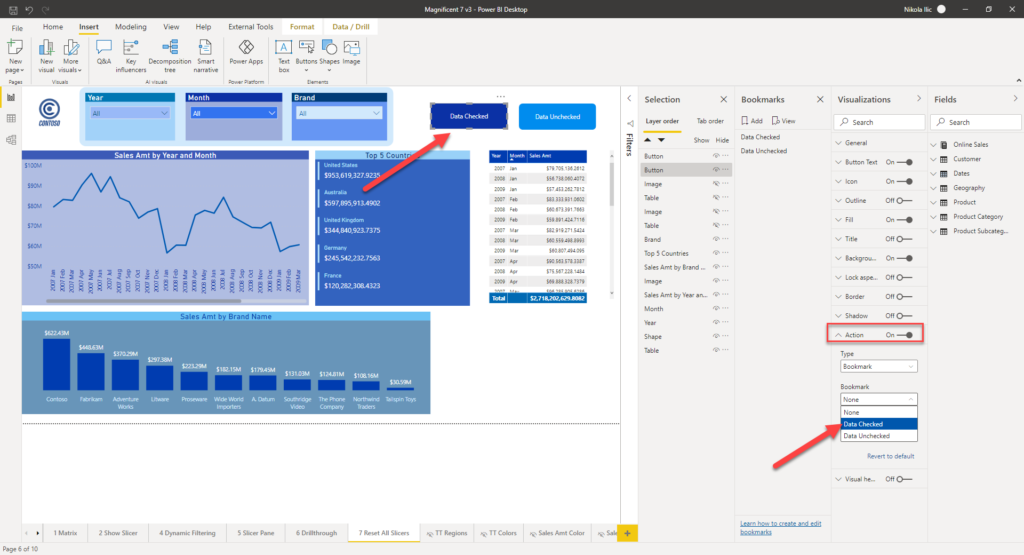
I will then place two buttons on the report page, to control the navigation between the bookmarks. In order for this to work, I will specify my bookmarks under the Action property:
Let’s go back now to the original state of our report when the Brand filter was not sliced to a specific value(s). And, look what happens if I click on Data Unchecked button:
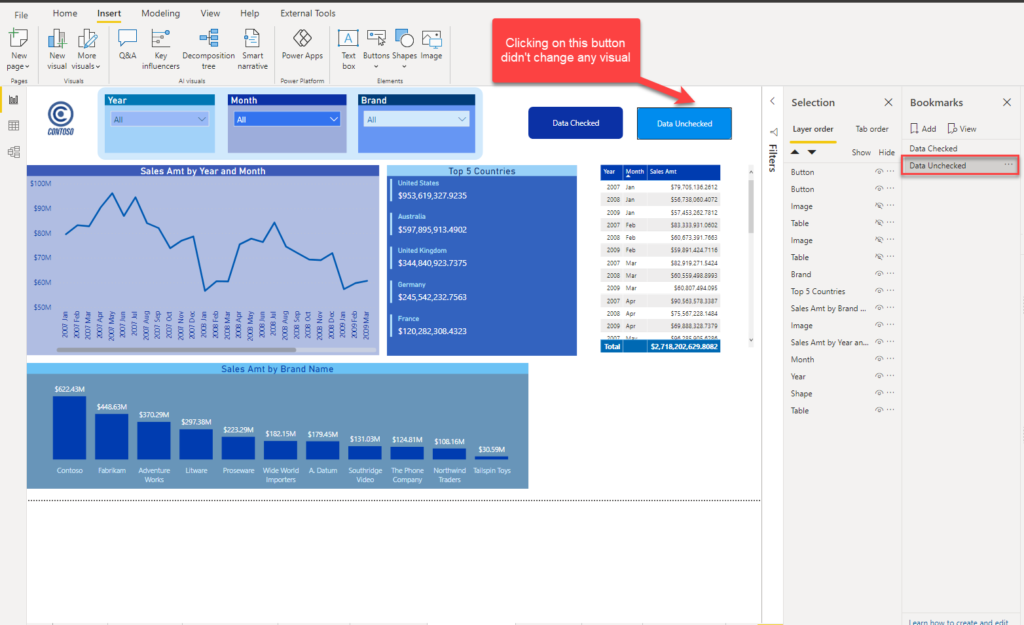
Nothing happened! As we unchecked the Data option, no slicer selection is being transferred to a bookmark. However, if I click on the other button, Data Checked, we can spot completely different behavior:
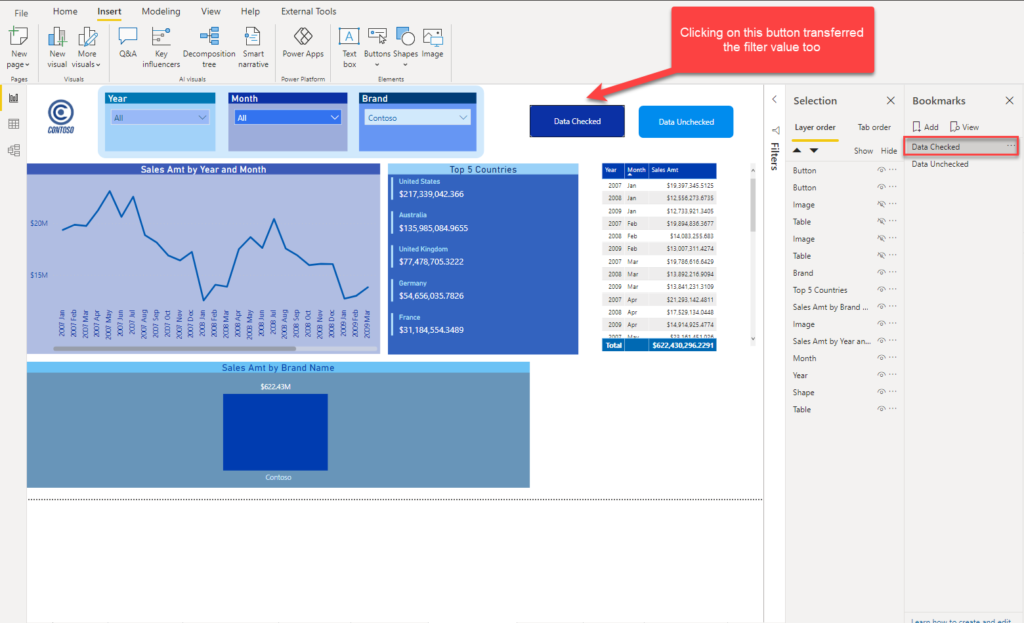
In this case, as the Data option was checked when we created our bookmark, captured state included data points defined in the slicer – so, no matter which value we select in our Brand slicer, once I click on the Data Checked button, I will see numbers for Contoso!
Let me show you how this looks like:
Conclusion
As you witnessed, bookmarks are really powerful feature, that can be applied in a whole range of different reporting scenarios. But, as with every powerful thing, it requires full control over it, in order to work in a proper way. That’s why it’s extremely important to understand various options that comes with bookmarks.
In most cases, those subtle differences can make a huge impact in the whole report experience. Truth to be said, in most scenarios you would uncheck the Data option while creating a bookmark, but there is one very handy use-case of leaving Data option checked, as I will explain in one of the next articles.
Thanks for reading!
Last Updated on February 17, 2021 by Nikola