
This article is the part of the series related to mastering DP-500 certification exam: Designing and Implementing Enterprise-Scale Analytics Solutions Using Microsoft Azure and Microsoft Power BI
Table of contents
Have you ever had a situation where some of your report consumers asked you to change “that” visual from a clustered column chart to a line chart? Or, to change the measure within the visual from Sales Amount to Order Quantity (yeah, I know, we could have achieved this by some clumsy workarounds, such as using a disconnected table and slicer)? Finally, Sarah comes to you and asks to remove the legend from the visual, while Paul wants to keep it there…
I hear you, I hear you…Of course, you had (many) situations like these mentioned above. We’ve all been there! And, that’s where the concept of personalized visuals comes to the rescue.
What is a personalized visual?
Simply said, by enabling the personalized visual feature, you are giving report consumers the possibility to customize the visual and adjust it to their own business needs. But, first things first…This feature is not something you get for granted – it needs to be explicitly enabled.
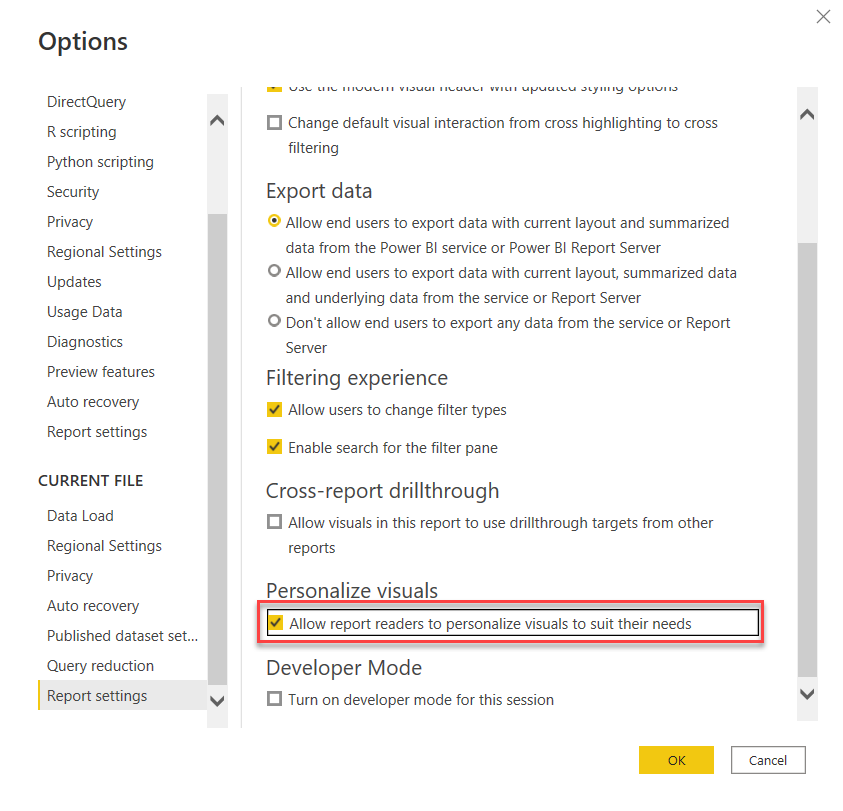
From the Power BI Desktop, you can turn this feature on in the Options window:
You can also enable this option directly from the Power BI Service, if you go to the Settings tab of the specific report:

This will enable Personalize visuals feature for the whole report!
However, let’s imagine that you have a report with multiple pages, but you don’t want your users to mess with visuals on some of the pages…Or, even further, let’s say that you have 5 visuals on one report page, and you want to enable user customization only on one of them…I have great news for you!
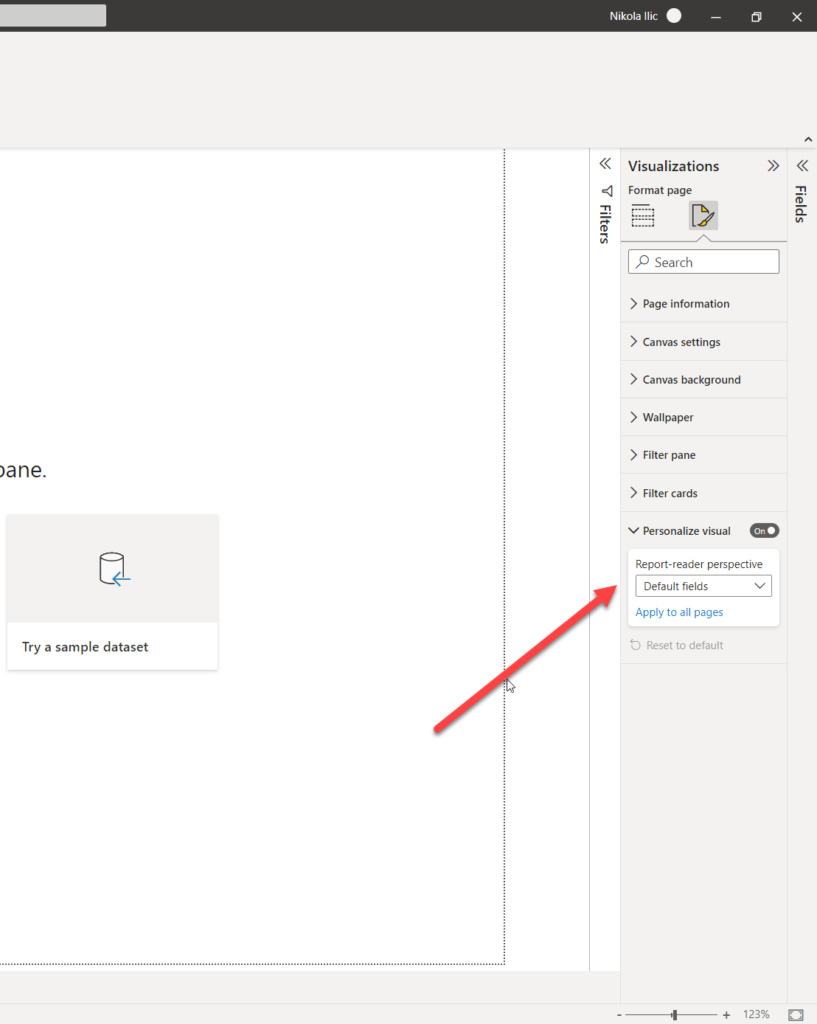
Personalize visual feature works also on a more granular level than for the whole report. In Power BI Desktop, under the Format page panel, you can find Personalize visual property, which can be additionally leveraged to apply to all report pages:
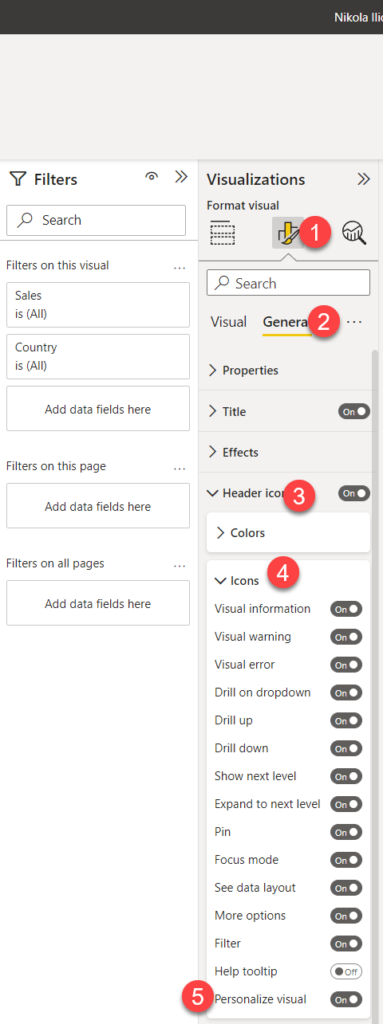
Finally, to enable Personalize visual feature for the specific visual only, you should select that visual and find the option under: General -> Header icons -> Icons -> Personalize visual
And, once I publish my report, the users will be able to adjust the “look and feel” of the certain visuals to their own preference:
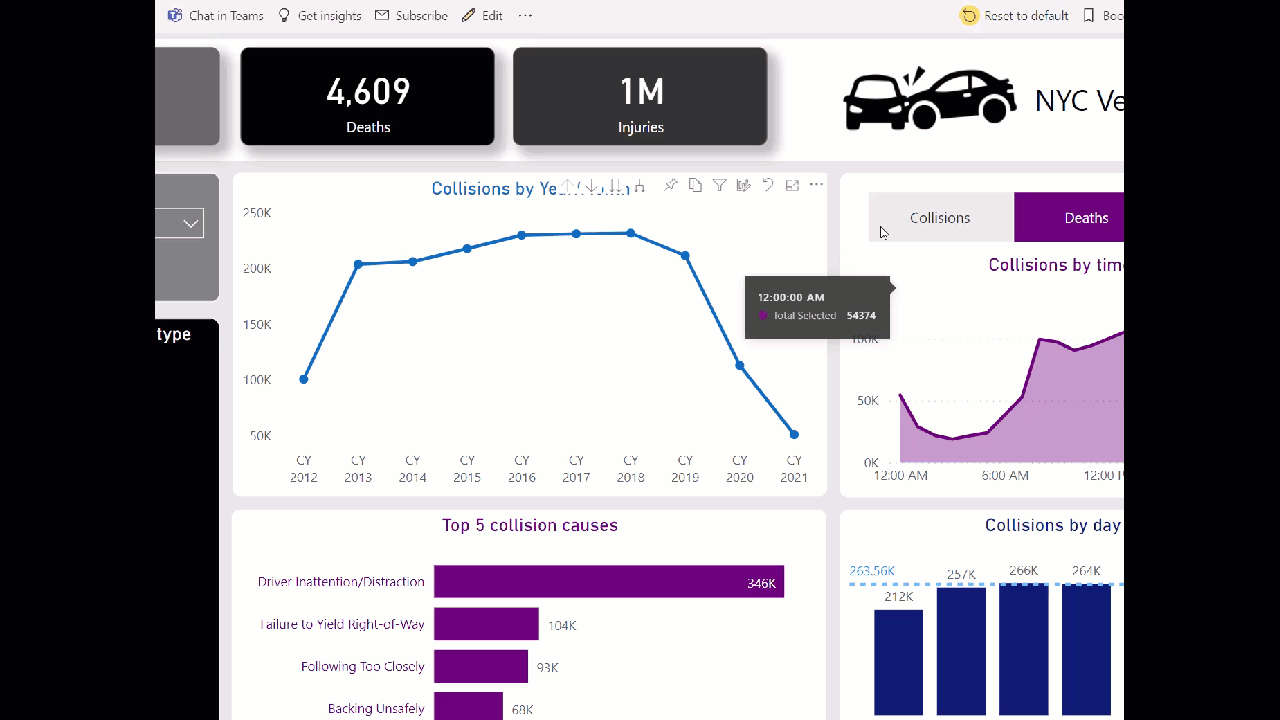
As you may see in the short video above, you can play around and modify a whole bunch of different visual properties, or even extend the original set of metrics included!
Keeping personalized visuals persistent
Well, that was nice. But, as a report consumer, it would be quite cumbersome if you’d have to go and repeat each of these steps every time you open the report. Again, I have great news for you!
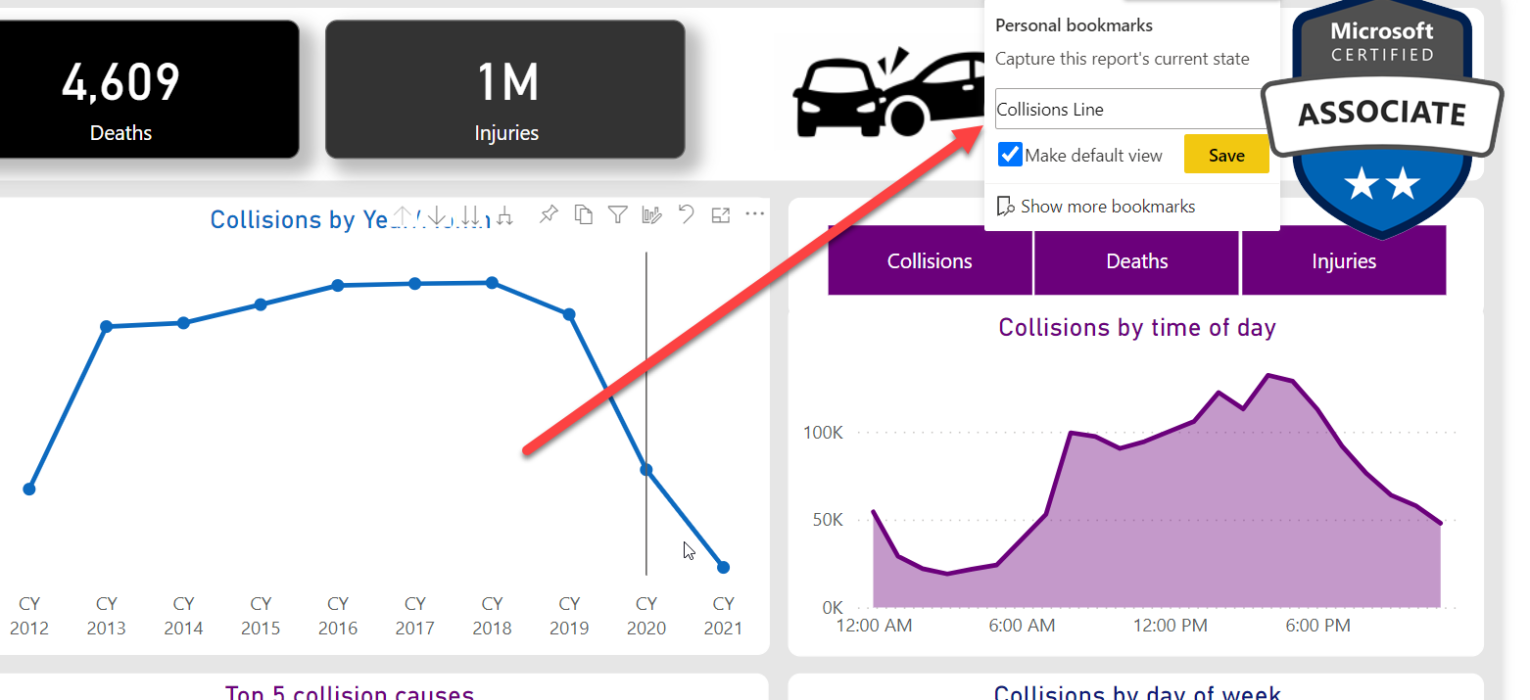
You can capture all the changes you made and save this as your personal bookmark:

In addition, you can check the box “Make default view”, so every time you navigate to this page, the personalized bookmark will be displayed by default.
There are two more important options to keep in mind when working with personalize visuals:
- Sharing – assuming that you have the required permissions to share the content, you can share the “personalized” version of the report. However, this will NOT overwrite the original report version

- Reset changes – if your user wishes to get rid of all the changes made using the personalize visual feature, they can do it in two possible ways. The whole report can be reverted to the original version by selecting the Reset to default option, next to the Bookmarks on the top, while it’s also possible to reset all or some of the changes applied to a specific visual:

Keep in mind that the changes you’ve applied to the visual(s) are not automatically persisted! You need to save the captured state of the report as a personal bookmark.
Conclusion
Personalize visuals is a very handy feature that enables you, as a report author, to provide report consumers with a high level of flexibility when choosing the most efficient way of transmitting the message. Don’t forget, this feature is not enabled by default – you should explicitly enable it in Power BI Desktop and/or Power BI Service.
Thanks for reading!
Last Updated on January 20, 2023 by Nikola


Jessica Jolly
I have mixed feelings about allowing personalization. I don’t necessarily want to have to answer questions about changes that someone else has made. What are your thoughts about supporting personalizations?
Nikola
Thanks for your comment, Jessica. Generally, I like them and I think it’s an undervalued feature in Power BI. However, I understand your concerns. In the end, I guess it’s all about educating report consumers on how to use certain features and functionalities:)