
If you follow my blog series on different levels of integration between Power BI and Azure Synapse Analytics, you should have already understood the key components and concepts behind Synapse Analytics. You could have also noticed that Synapse brings a whole bunch of possibilities to handle various analytic workloads in one single place.
However, it’s not the current state of the product that I admire, but its general direction and rapid development in multiple different areas.
One of the features that were “shady”, to say at least, was the cost management in Synapse Analytics Serverless pool. Up until recently, it was hard to measure the costs of a specific workload, let alone a single query itself! There was generic information that the Serverless SQL pool will cost you starting from 5$/TB of processed data, but there was no deeper insight or ways to measure and manage the costs.
But, as I already mentioned, things change quickly in Synapse Analytics, and they often change for the better…
What am I paying for in Serverless SQL?
The first thing to keep in mind is that you are paying for the amount of data processed. As specified in this article, processed data includes few different items, such as the amount of data read from storage, but also the amount of data transferred to your endpoint (for example, Power BI), and the amount of data materialized (for example, if you use external tables to export your results to storage).
Option #1 Synapse Studio for cost control configuration
The first place where you can analyze your workloads is Synapse Studio. Under Monitor property on the right, under Activities, you can see SQL requests option:
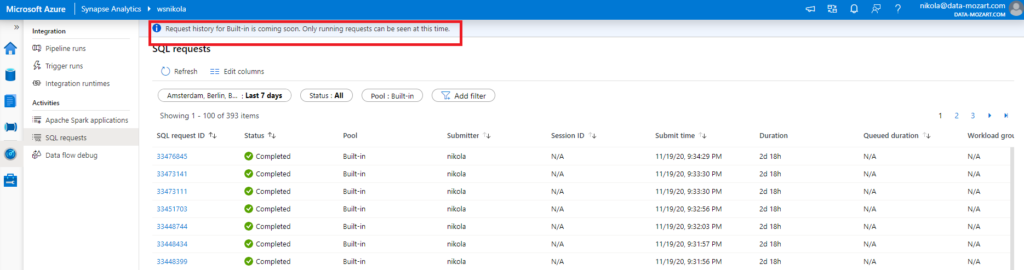
Even if it states that you still can’t see query history, but only running queries, this is not true:)
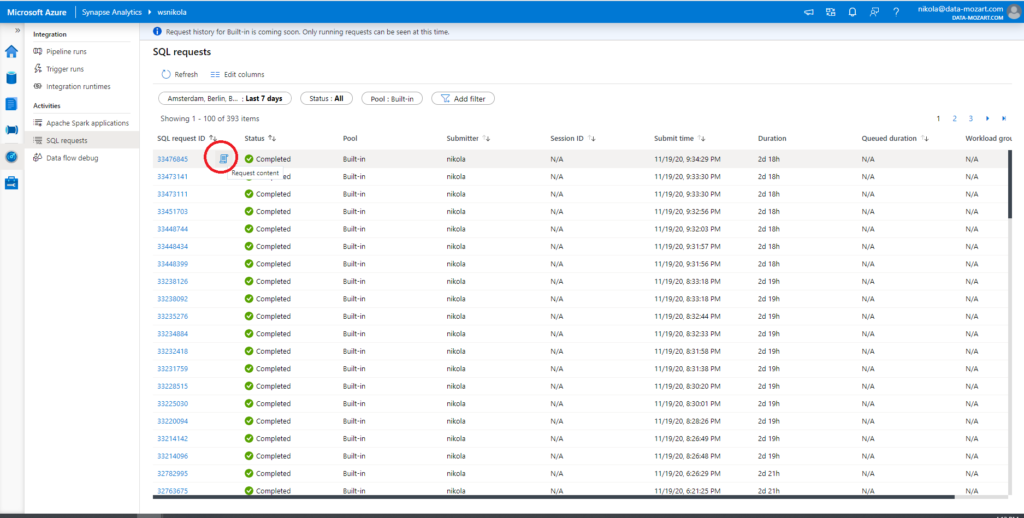
As you can see in the illustration, not that you can see all the queries you’ve run, but also see the SQL code behind the specific request!
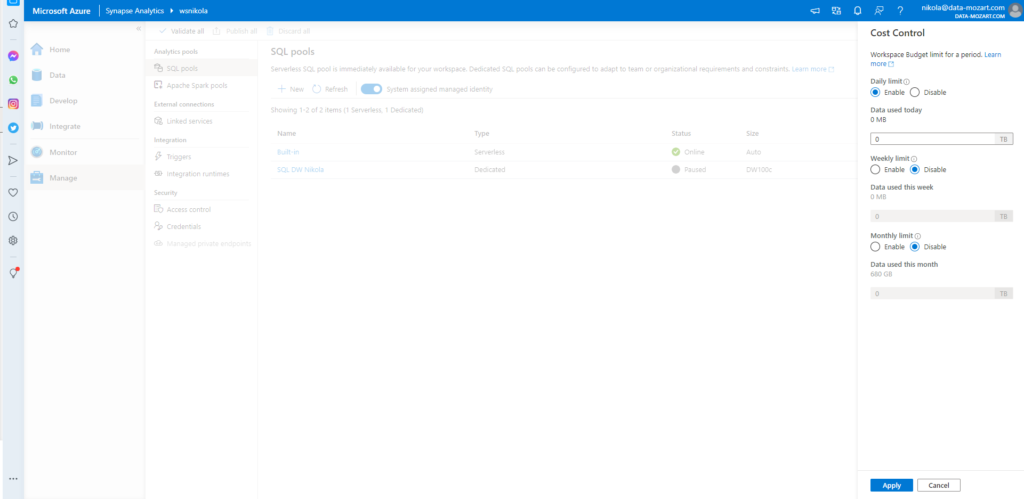
In addition, you can control your costs by setting the limits on a daily, weekly, or monthly level! That’s a huge improvement! Just go to the Manage tab, and click on the small money sign.
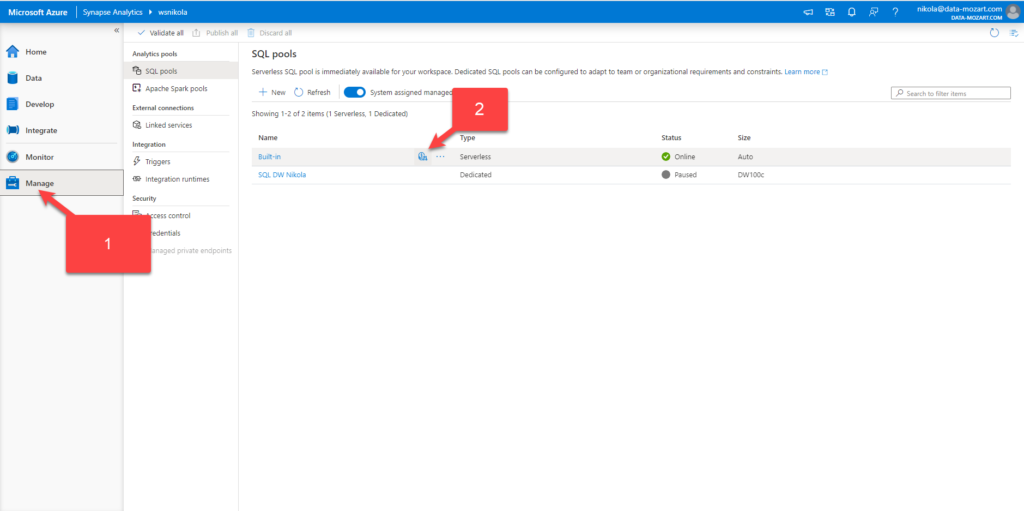
Once you click on it, you will have an option to choose your preferred limit for specific time period:
Option #2 T-SQL for cost control configuration
If you don’t want to configure your limits through UI, you can also write a T-SQL to achieve the same:
sp_set_data_processed_limit
	@type = N'daily',
	@limit_tb = 5

sp_set_data_processed_limit
	@type= N'weekly',
	@limit_tb = 10

sp_set_data_processed_limit
	@type= N'monthly',
	@limit_tb = 50
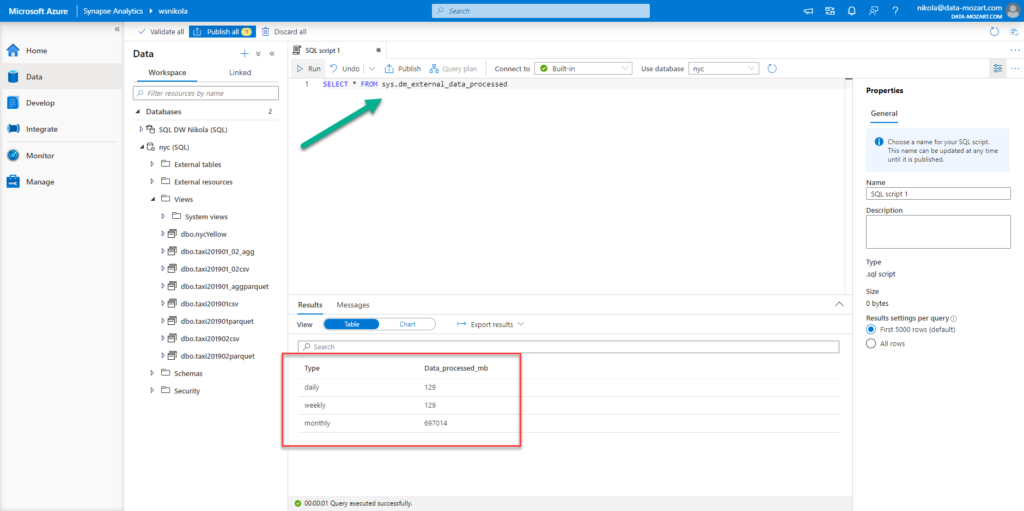
In case you want to check how much data you burned during the specific period, you can execute following T-SQL command, and check the consumption:
SELECT * FROM sys.dm_external_data_processed
Option #3 SSMS for cost control
Now comes my favorite part! You can check the cost of a specific query using good old SSMS! Azure Data Studio is also an option for those who prefer to use it.
Once I connect to my Serverless SQL endpoint from the SSMS, I can see all my database objects. Let’s run a few queries and see how much will they cost.
SELECT COUNT(*)
FROM dbo.taxi201901csv
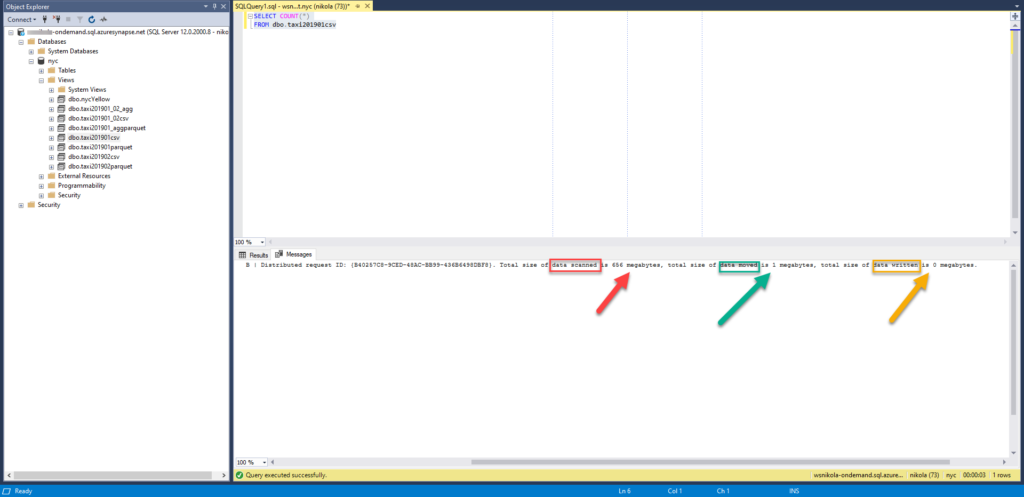
So, this simple count of all of the records in my view that was created over a CSV file in one of the previous articles, costs me 657 MB (656 MB of scanned data + 1 MB of moved data + 0 MB of written data). In terms of money, that’s ~0.0033$.
Let’s now retrieve all the columns for the top 100.000 rows and check the costs again:
SELECT top 100000 *
FROM dbo.taxi201901csv
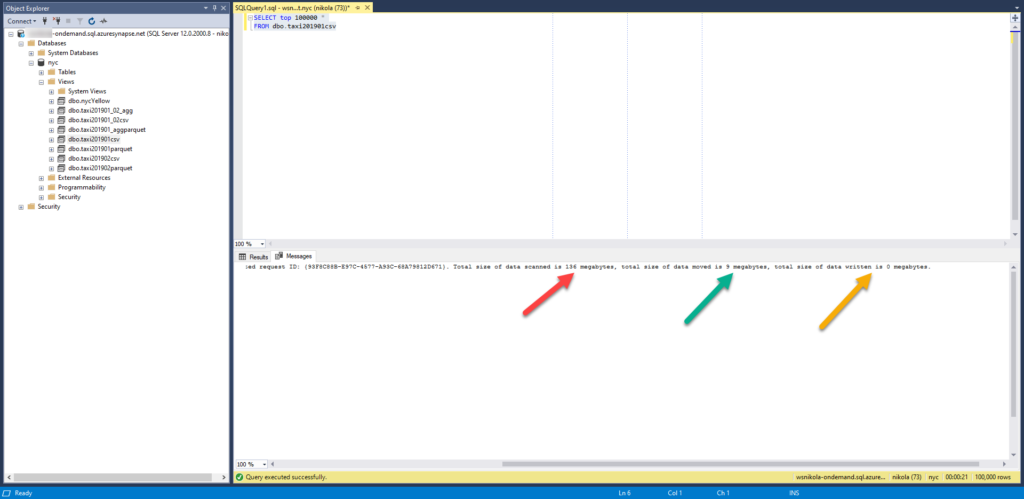
Now, the engine had to scan less data (because it didn’t have to go all the way through to check how many rows exist), but we now have to pay more for the data moved, as instead of returning one single column, we returned all of them! Data written is still 0, because we haven’t materialized anything with this query. So, the overall amount of data processed for this query is 145 MB (136+9).
You can also see all these detailed metrics using Synapse Studio.
Finally, you can also materialize a portion of data for later usage, using CETAS (Create External Tables As Select). When using a Serverless SQL pool, CETAS creates an external table and export query result set to Azure Blob Storage or ADLS Gen2 (Data Lake). In this scenario, you will need to calculate Data written also into the final figure of Data processed.
Conclusion
Synapse Analytics rapidly changes and constantly offers new features to improve overall user experience and bring more transparency with cost management in Serverless SQL pool.
As you’ve noticed, we could easily retrieve amount of data processed for every specific query, using well-known tool SSMS.
Thanks for reading!